Desk Woodworking Project: Success!
As someone who creates things on computers all day, I rely on my desk a lot. It holds up my computer. It holds up my snacks. It holds up my head when I need a nap. Since a good desk is essential to anyone who sits a lot, it really is important to have a nice one, so when my big, blocky Ikea desk started to fall apart at the seams, it was time to make an upgrade.
This gave me a great excuse to combine two hobbies I’d been aspiring to make some headway on – digital music production and woodworking. The latter would be the means for which I’d acquire my new desk, creating a custom workstation to start the former. I decided I’d make a stab at making a desk with a slide-out drawer big enough to house a keyboard, having been inspired by a coworker’s desk that did the same. After rummaging the internet for some inspiration I found a great desk design ripe for imitation. From there it was a matter of trying to reverse engineer the design and figure out the materials needed to make it happen.
This was by far the biggest (and one of the first) woodworking projects I’ve taken on, so a lot of what I did I learned on the job after making numerous mistakes. For example, the first time I bought my wood (poplar), I did so from Home Depot in 8 foot finished planks, storing them in multiple locations and subjecting them to serious warping. It wasn’t until after making this discovery that it was suggested to me by the awesome folks at the LA Community Woodshop (where I made the desk and subjected the crew to about 1,302 questions along the way) that I buy my wood unfinished from a lumber yard, mill it down myself and put it to use as soon as possible so as to minimize any warping. Of course, this technique requires some serious machines, but again, the Community Woodshop was able to provide in that department as well. Soon I had seven perfectly straight and level boards to create the top of my desk. I joined them together with a domino jig (similar to a biscuit joiner), and after allowing a couple hours for the glue to settle, I was well underway towards my new desk.
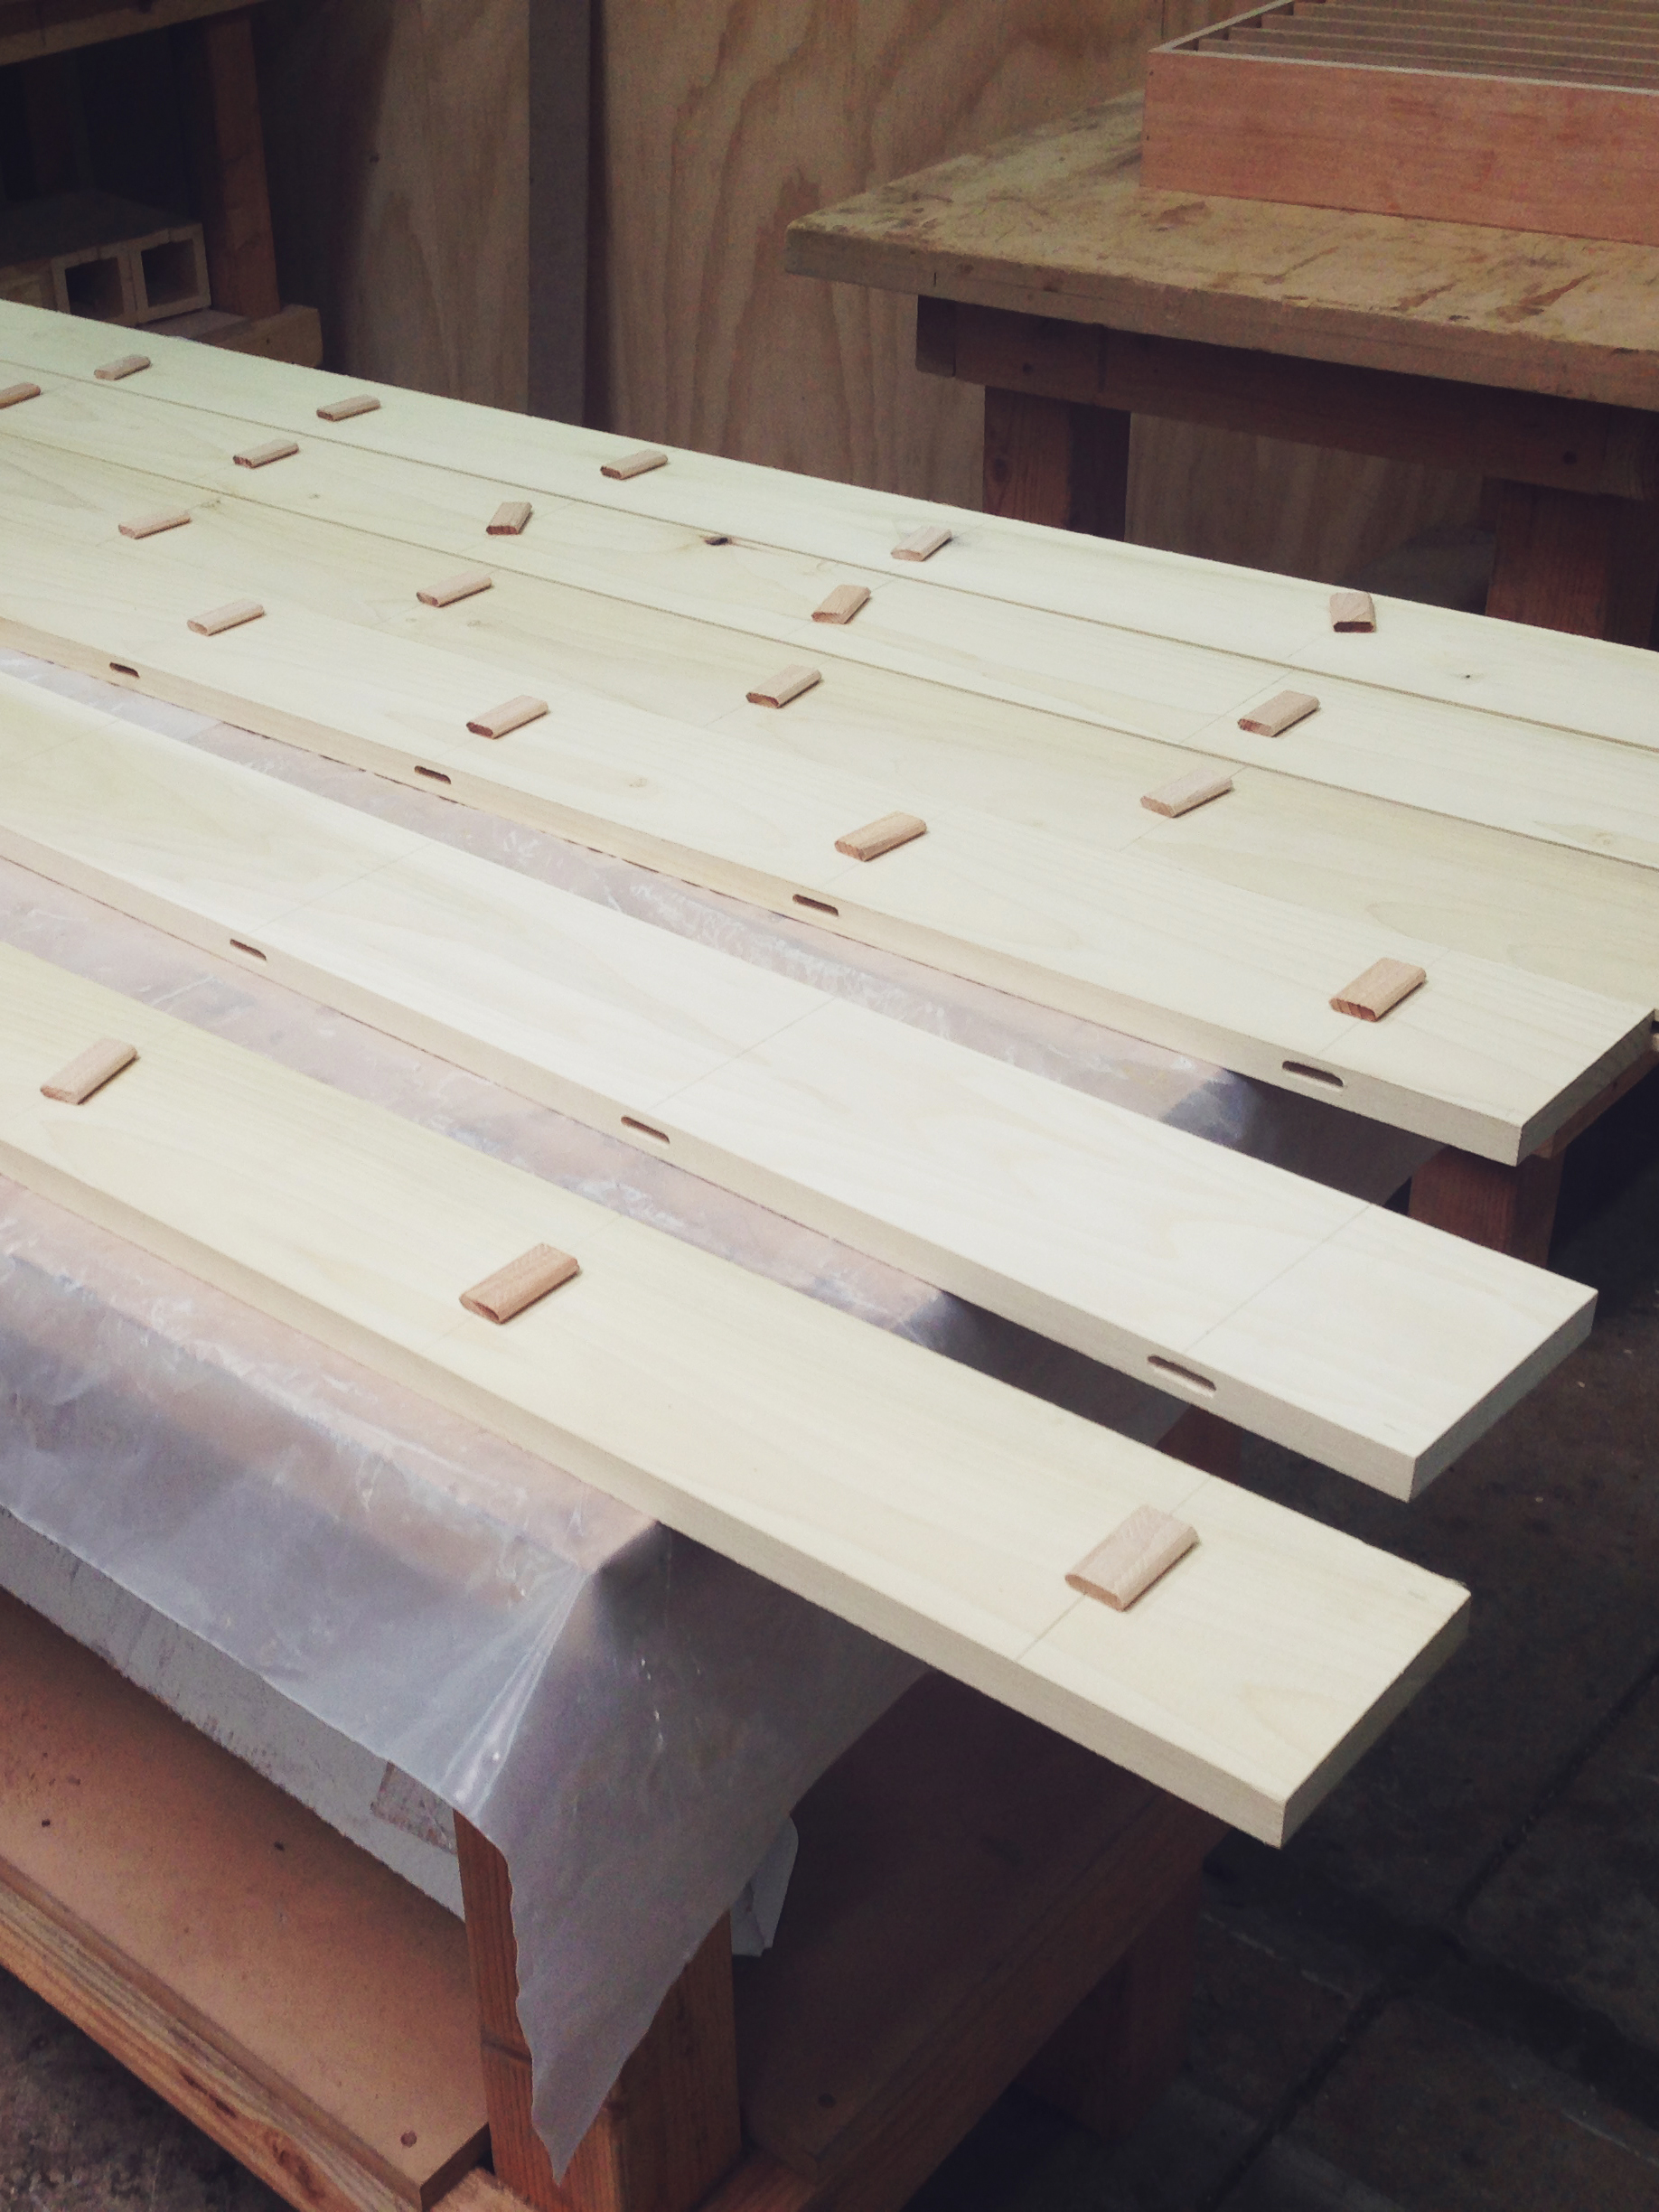
Using a domino jig, I created holes in the sides of the planks and glued those little biscuits (called dominoes) into them to join all the boards.
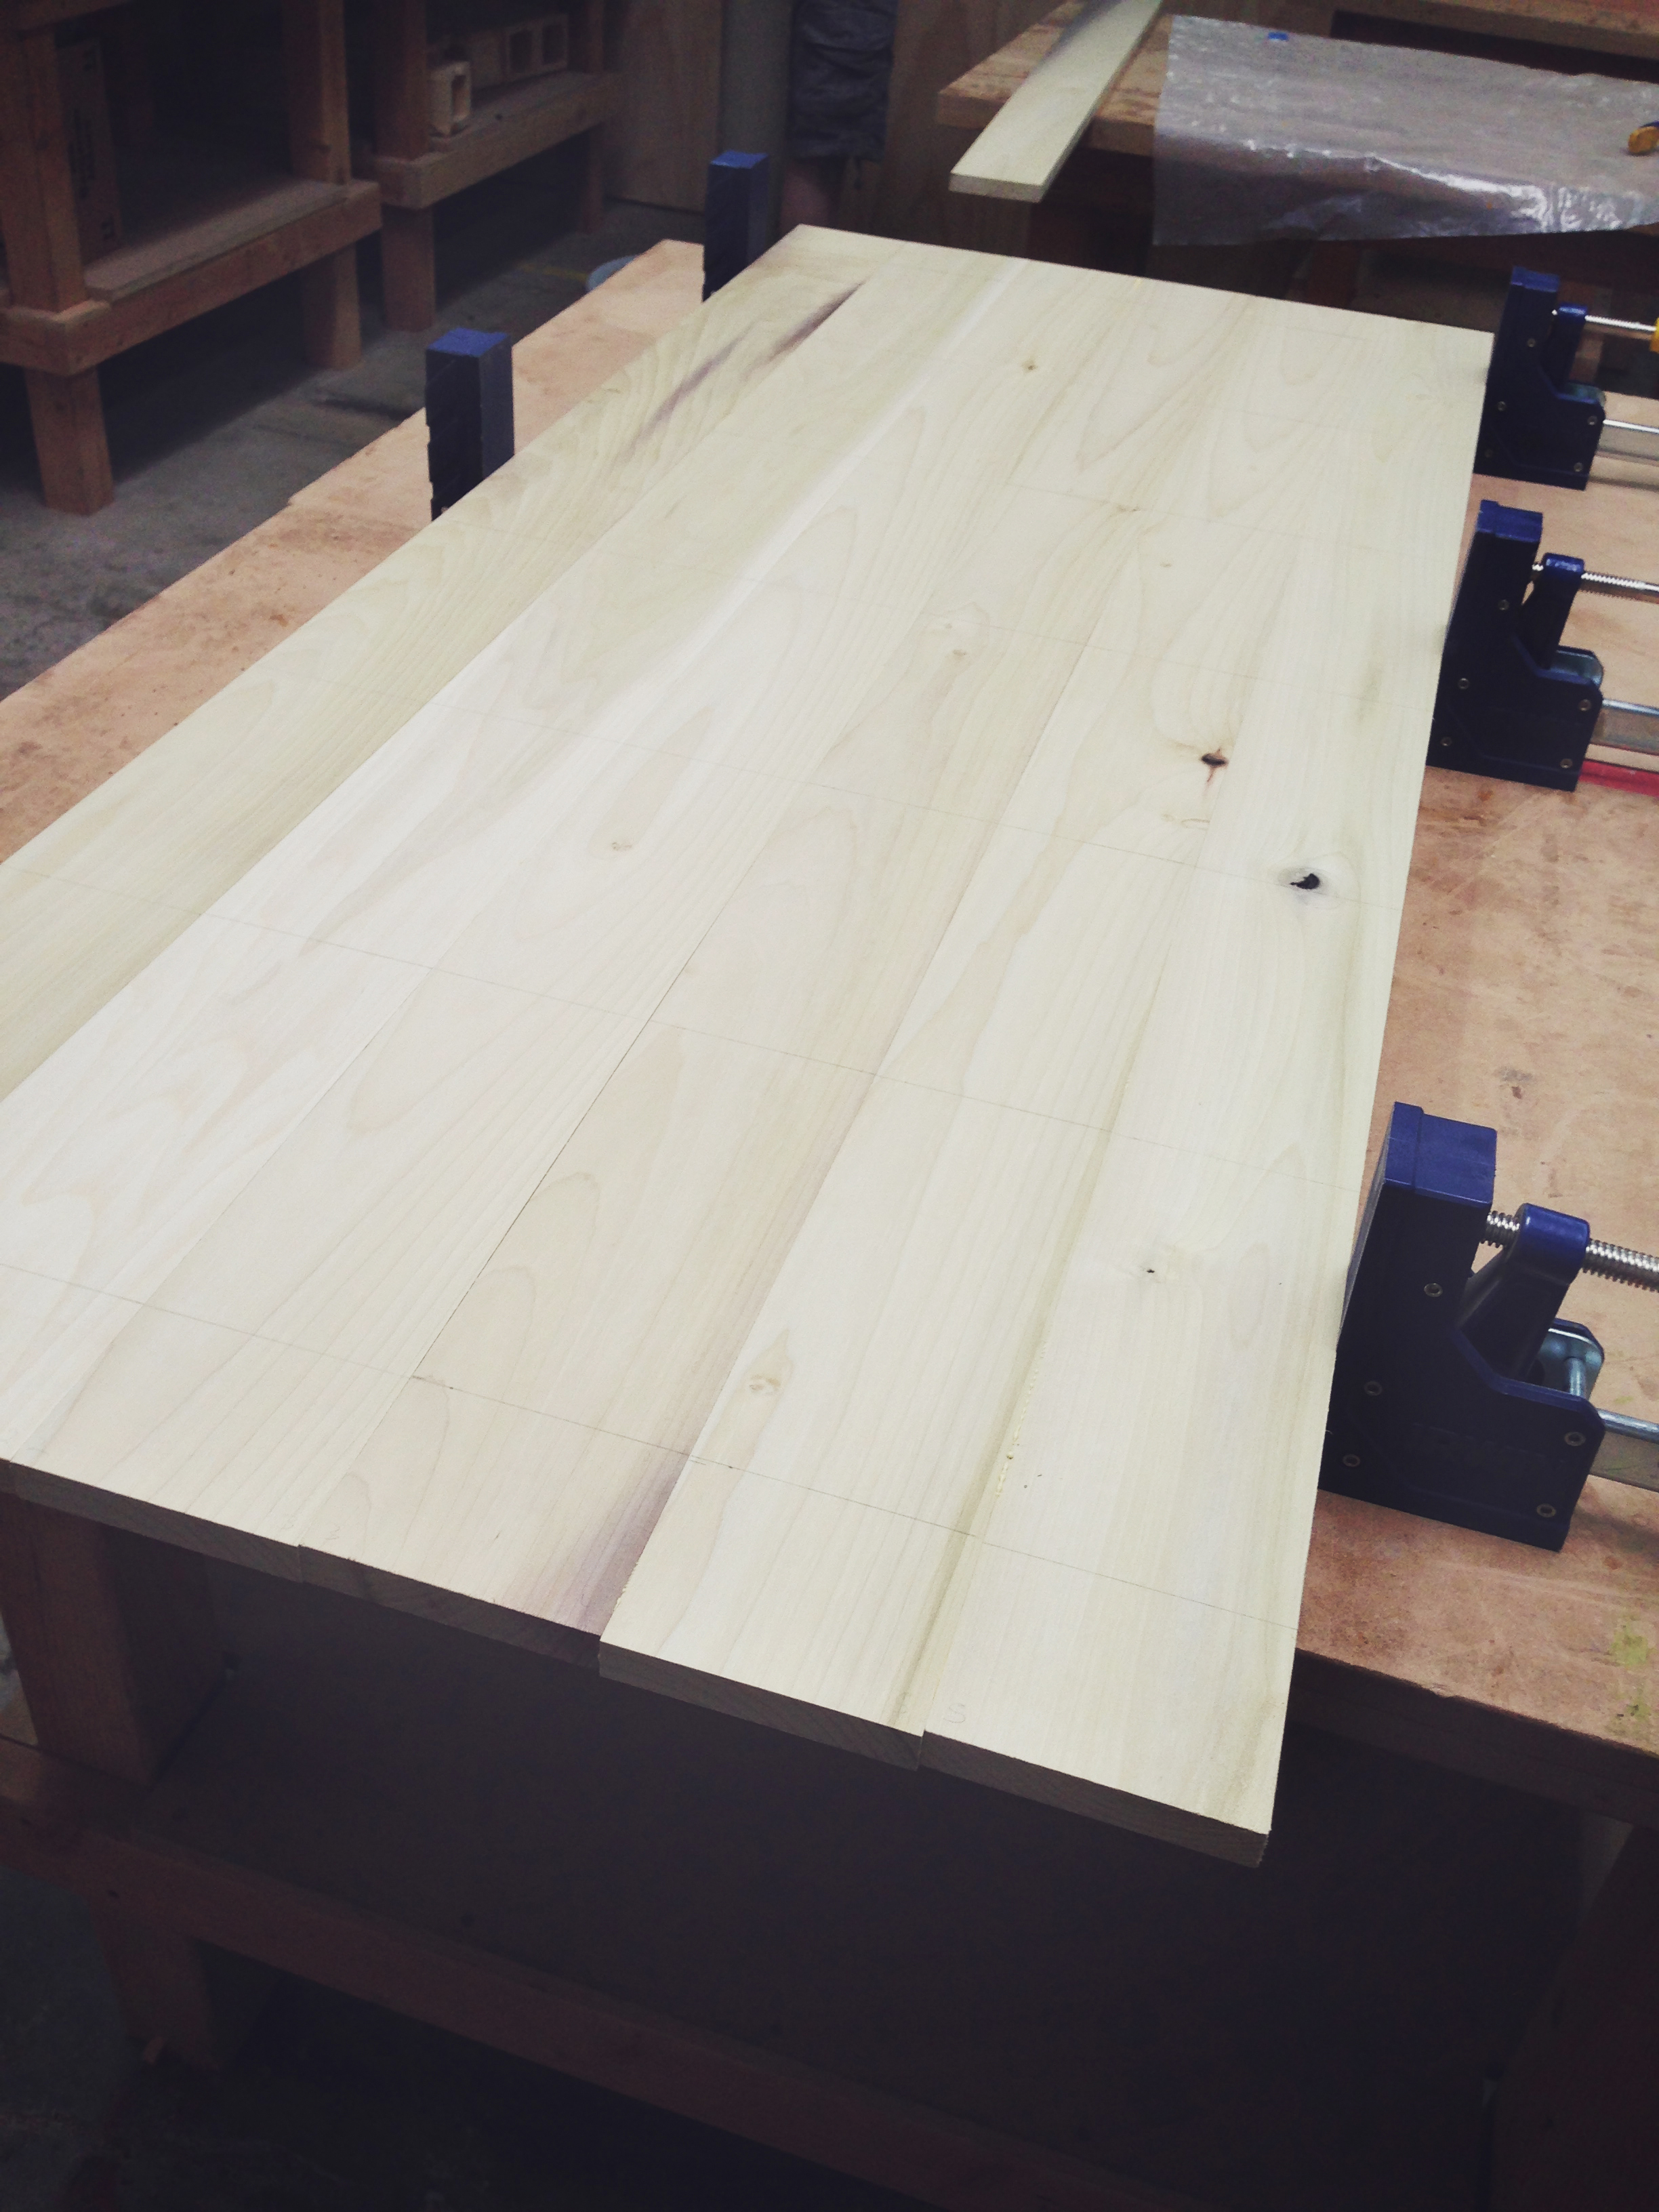
Table top glued and clamped together for drying.
Next came putting together the shelf housing. To minimize weight and cost I used pine for all the inward facing pieces, but figuring out exactly what pieces would end up facing the outside ended up being a bit of a process. I would double check my designs before making a cut, and it seemed like every time I did I’d realize I was missing something from my plans – i.e. not accounting for the 1/8″ of lost material from the saw blade – and would have to adjust on the fly. I’m sure it helps if you’ve done it for a long time, but I learned being able to make adjustments (and do math) on the fly really helps you out when in the shop.
What proved the hardest was creating the shelf fronts. I wanted to create an inlay effect like in the desk I was referencing, but the maneuver proved to be pretty tough. I ended up having to use a table router to cut out grooves along the middle of four side pieces and wedging a thin plane of wood between them to complete the effect. Not sure if I followed any proper conventions here, but I tip my hat to anyone skilled in the art of cabinetry. Table routers are scary as hell.
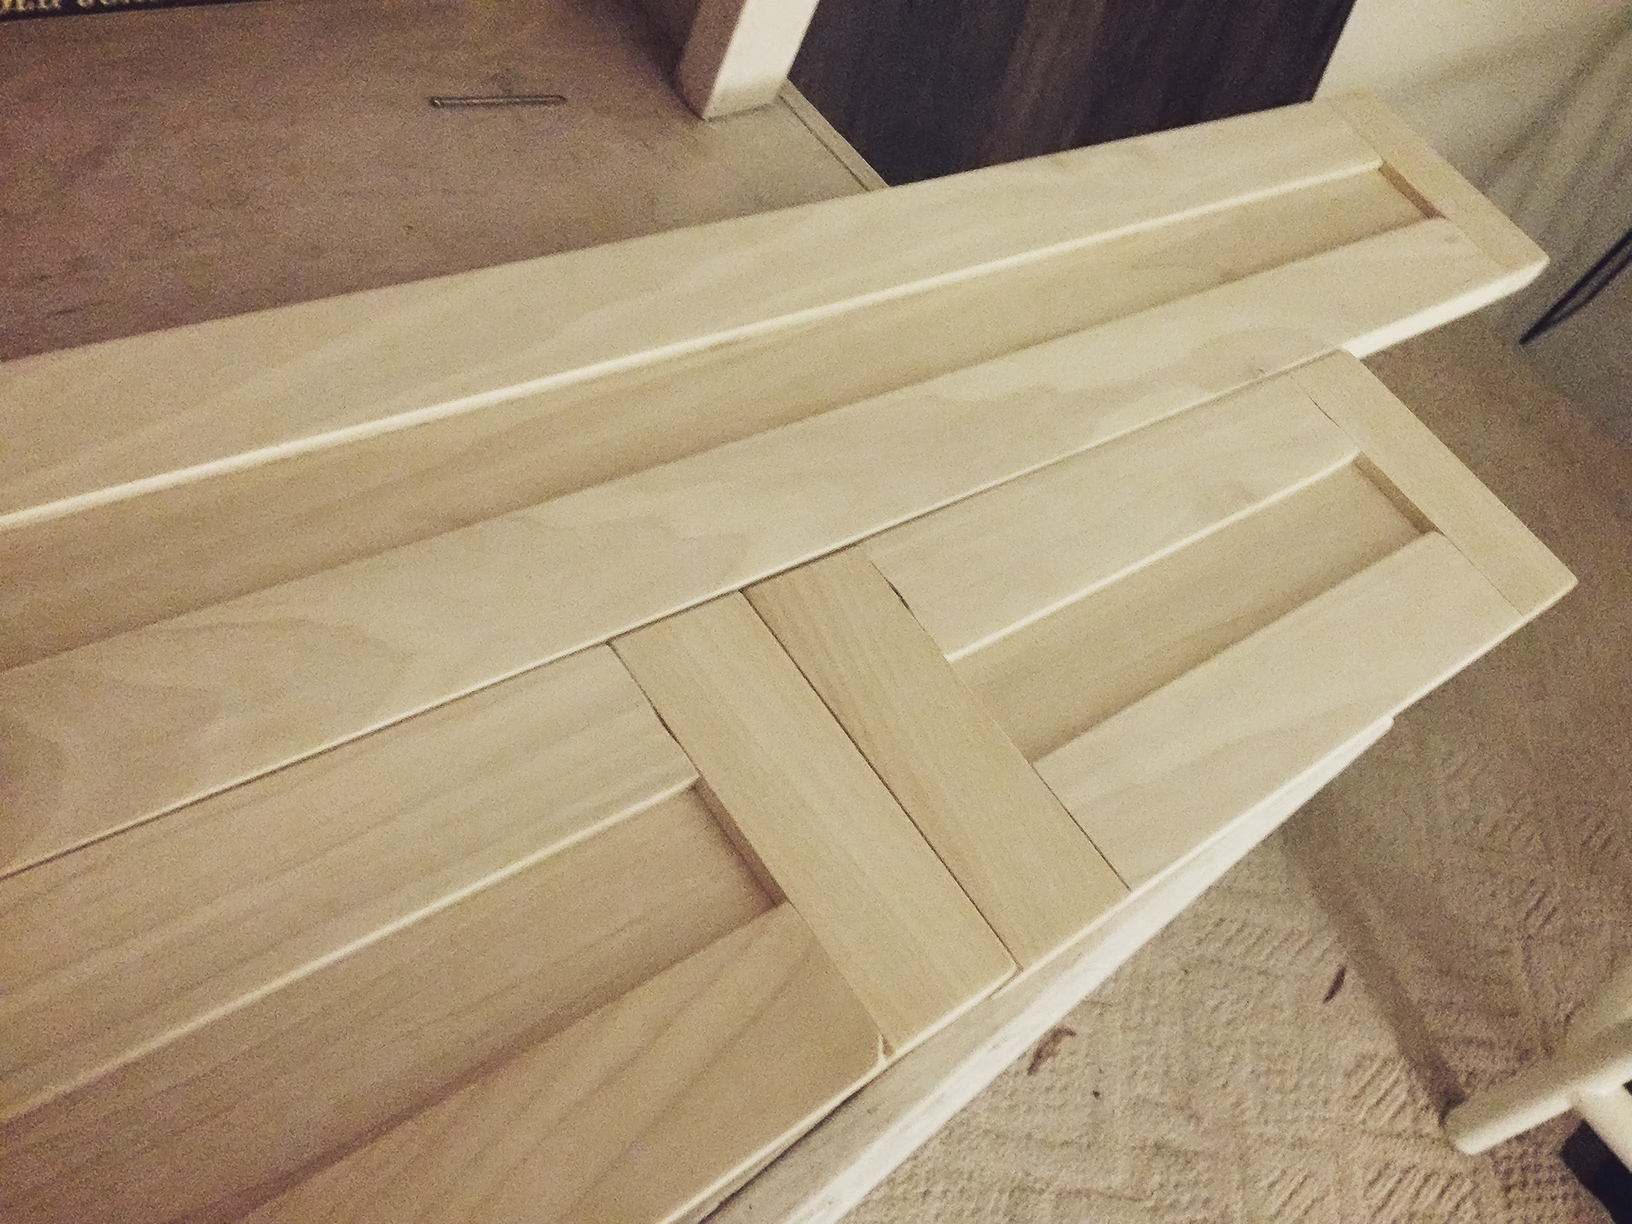
You can see small bumps and bruises where the table router got the best of me, but for the most part I was happy with the results.
Anyways, after many hours lost to mis-cuts and plan reconfiguration, I did end up with what I needed and was able to take my pieces home to assemble at the Westside Woodshop (aka, my little porch). From there is was a matter of putting nails to wood, staining everything, and attaching the legs.
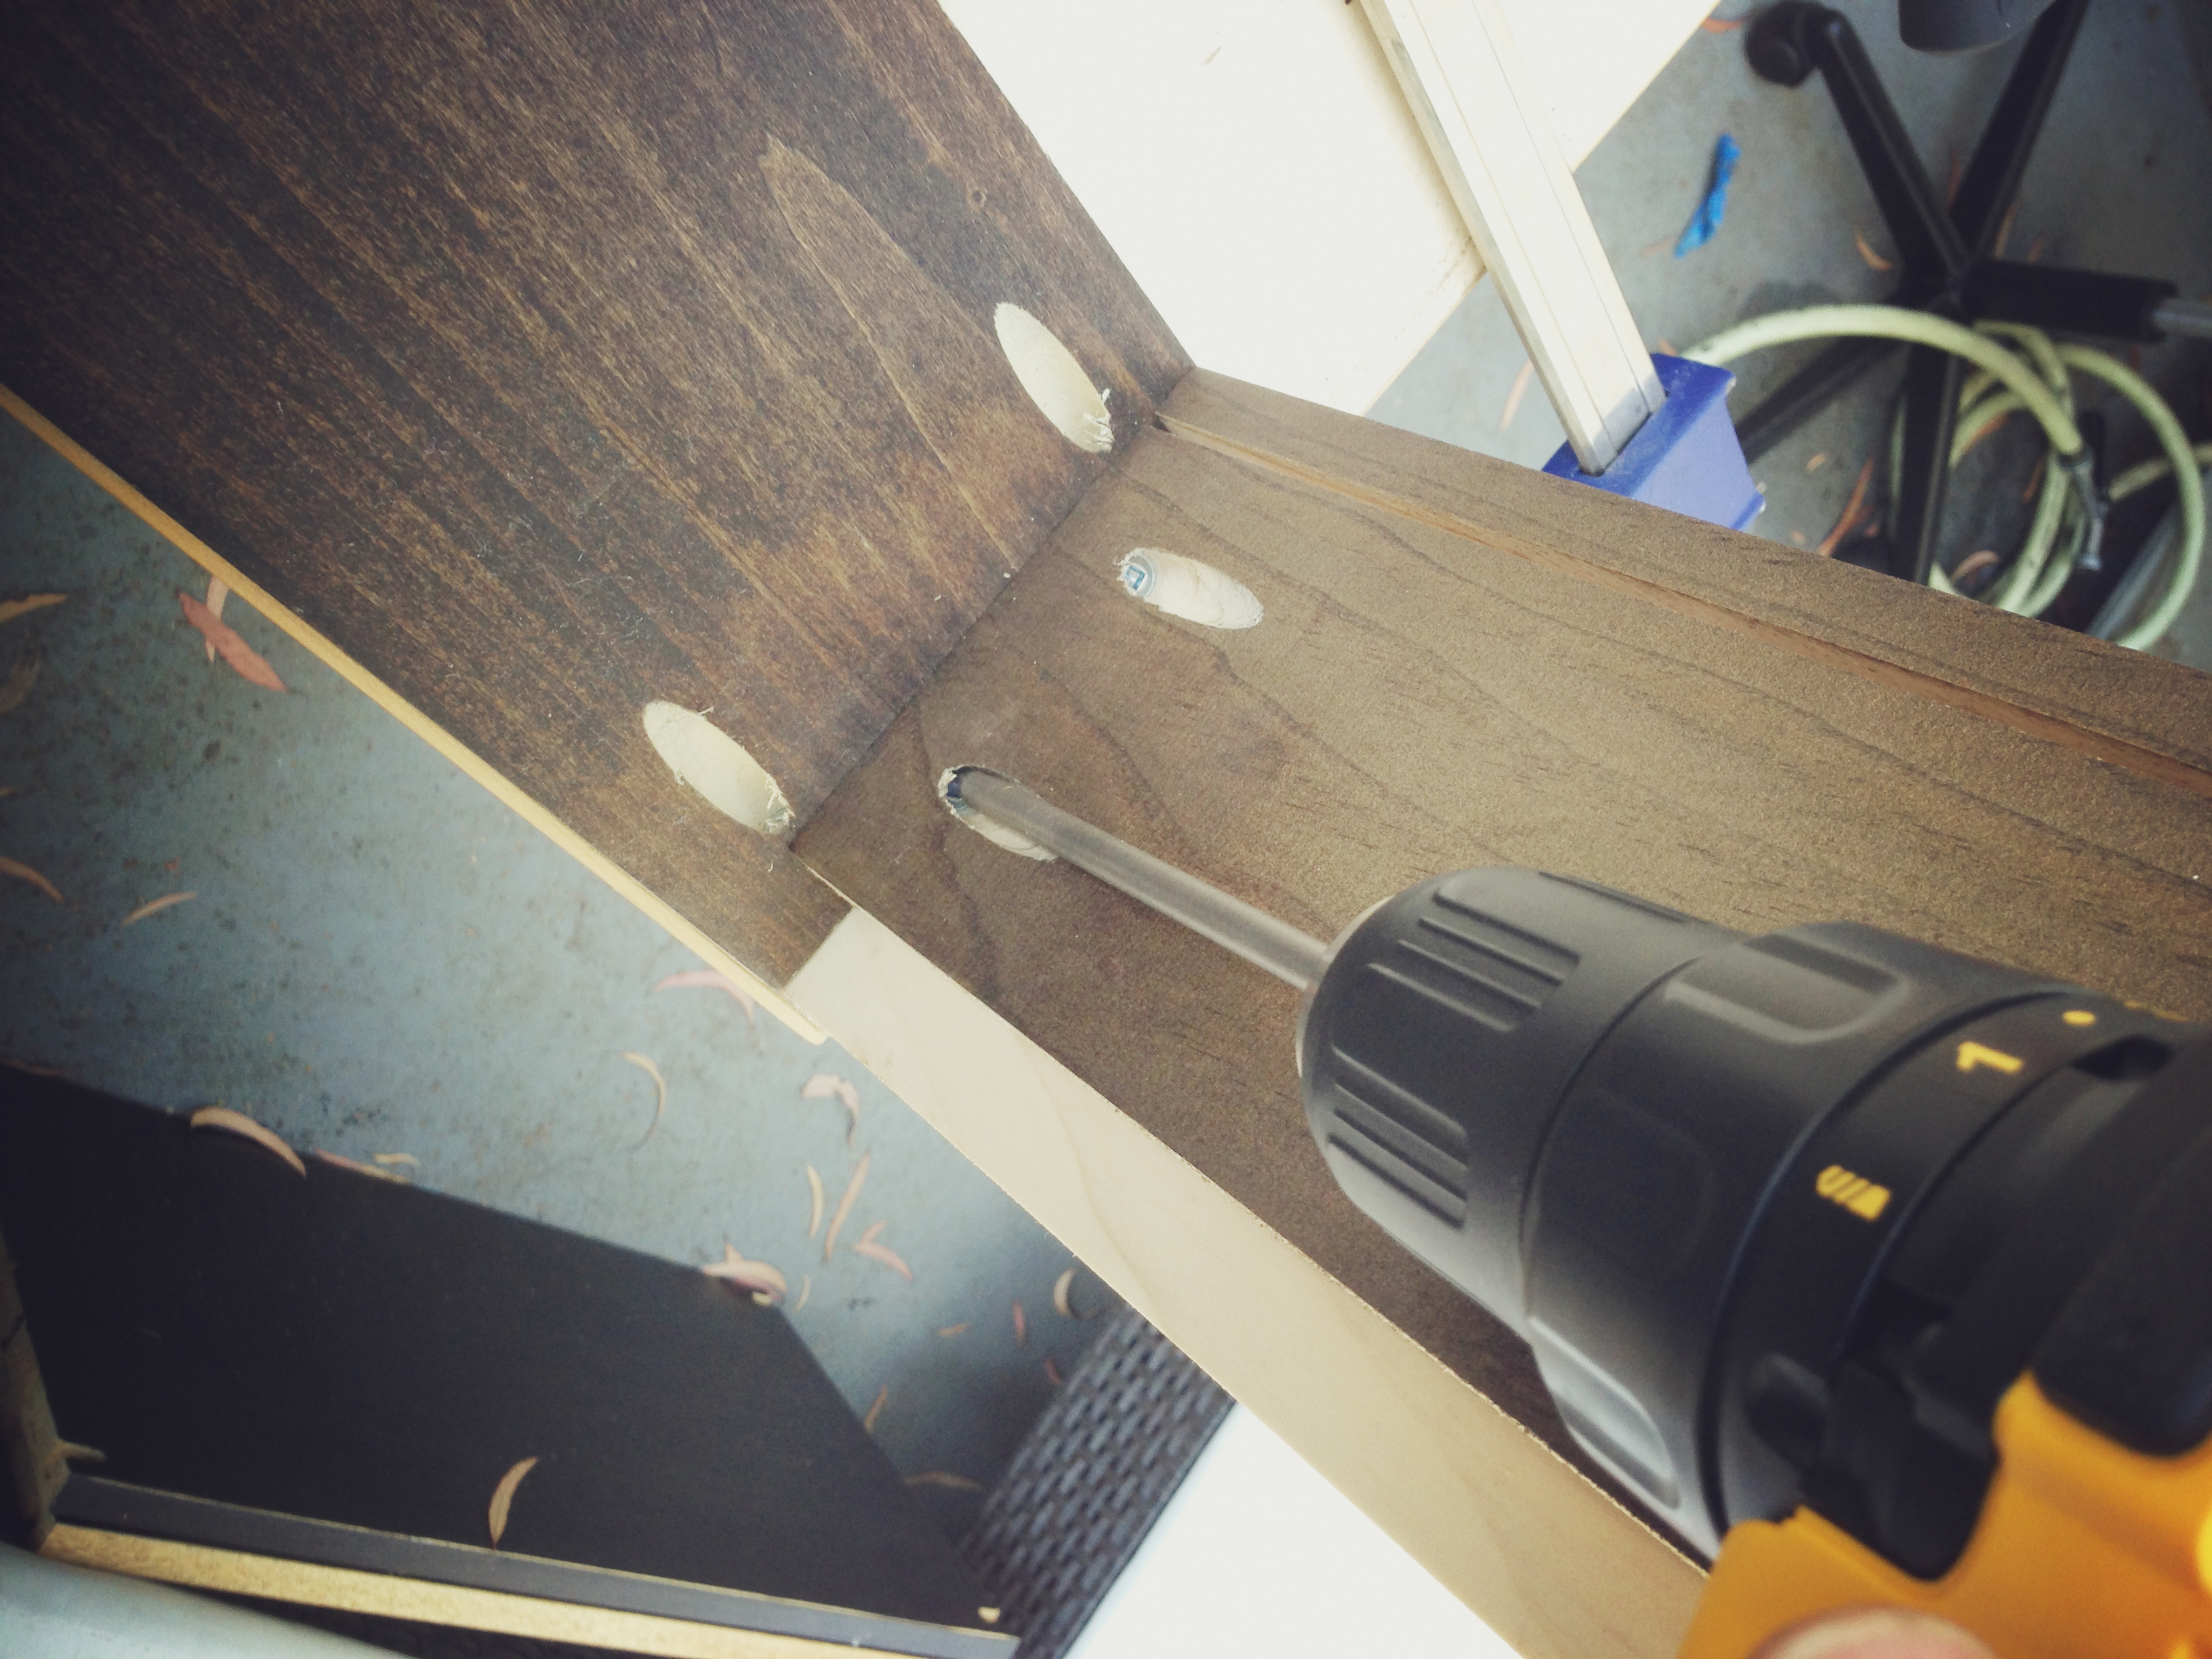
I bought a pocket hole jig for a prior project and it was an essential tool on this project. So helpful for hiding strong joints in hard to reach places.
Creating the shelves was a process entirely on its own. Constructing them was straightforward enough, but lining up the sliders on the frame with the sliders on the shelves proved to be a real pain. Afterwards I realized this was because I aligned the sliders in the middle of the shelves when it would have been way easier to simply align the sliders on the bottom. That way, you avoid having to measure the distance between the bottom of the shelf and the start of the slider, whether the slider is level, etc.
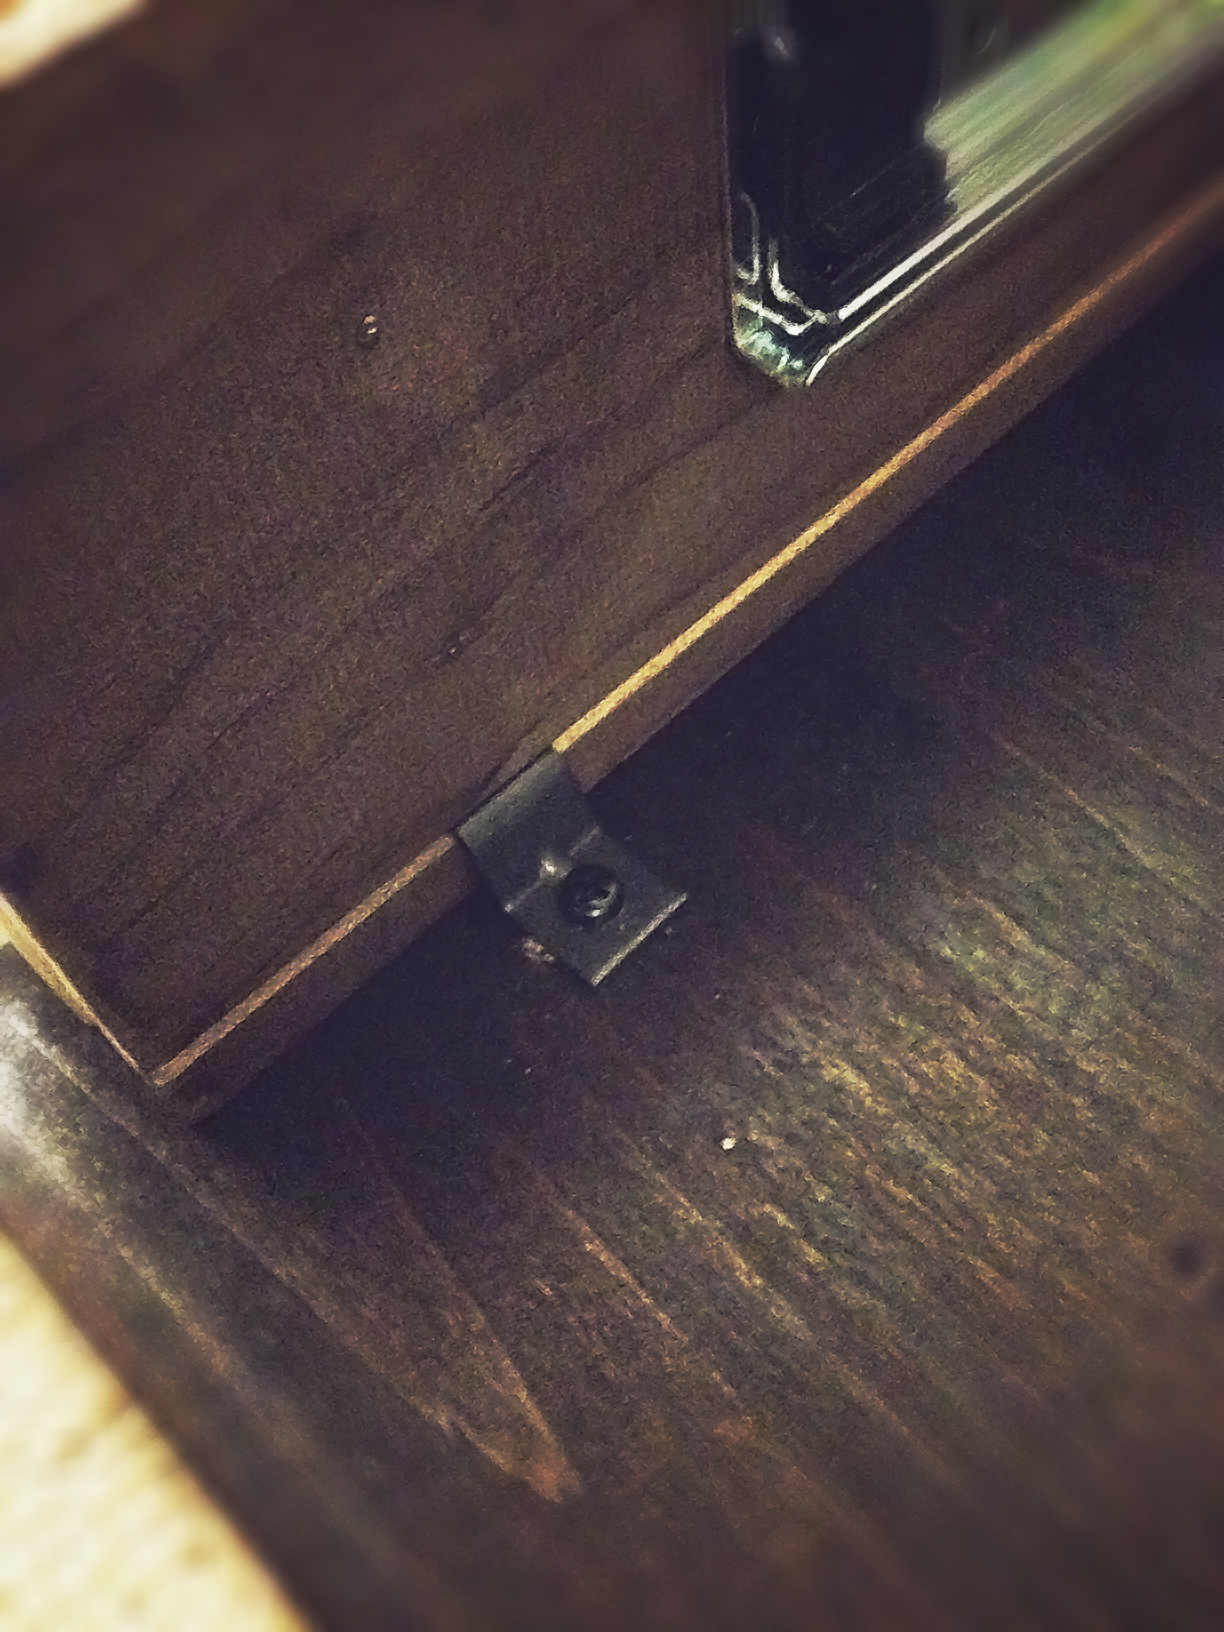
I attached the table top to the rest of the desk using s-clips. By slotting one end into grooves along the sides of the desk and fastening the other to the underside of the desk top, the piece has room to settle without risk of straining the wood.
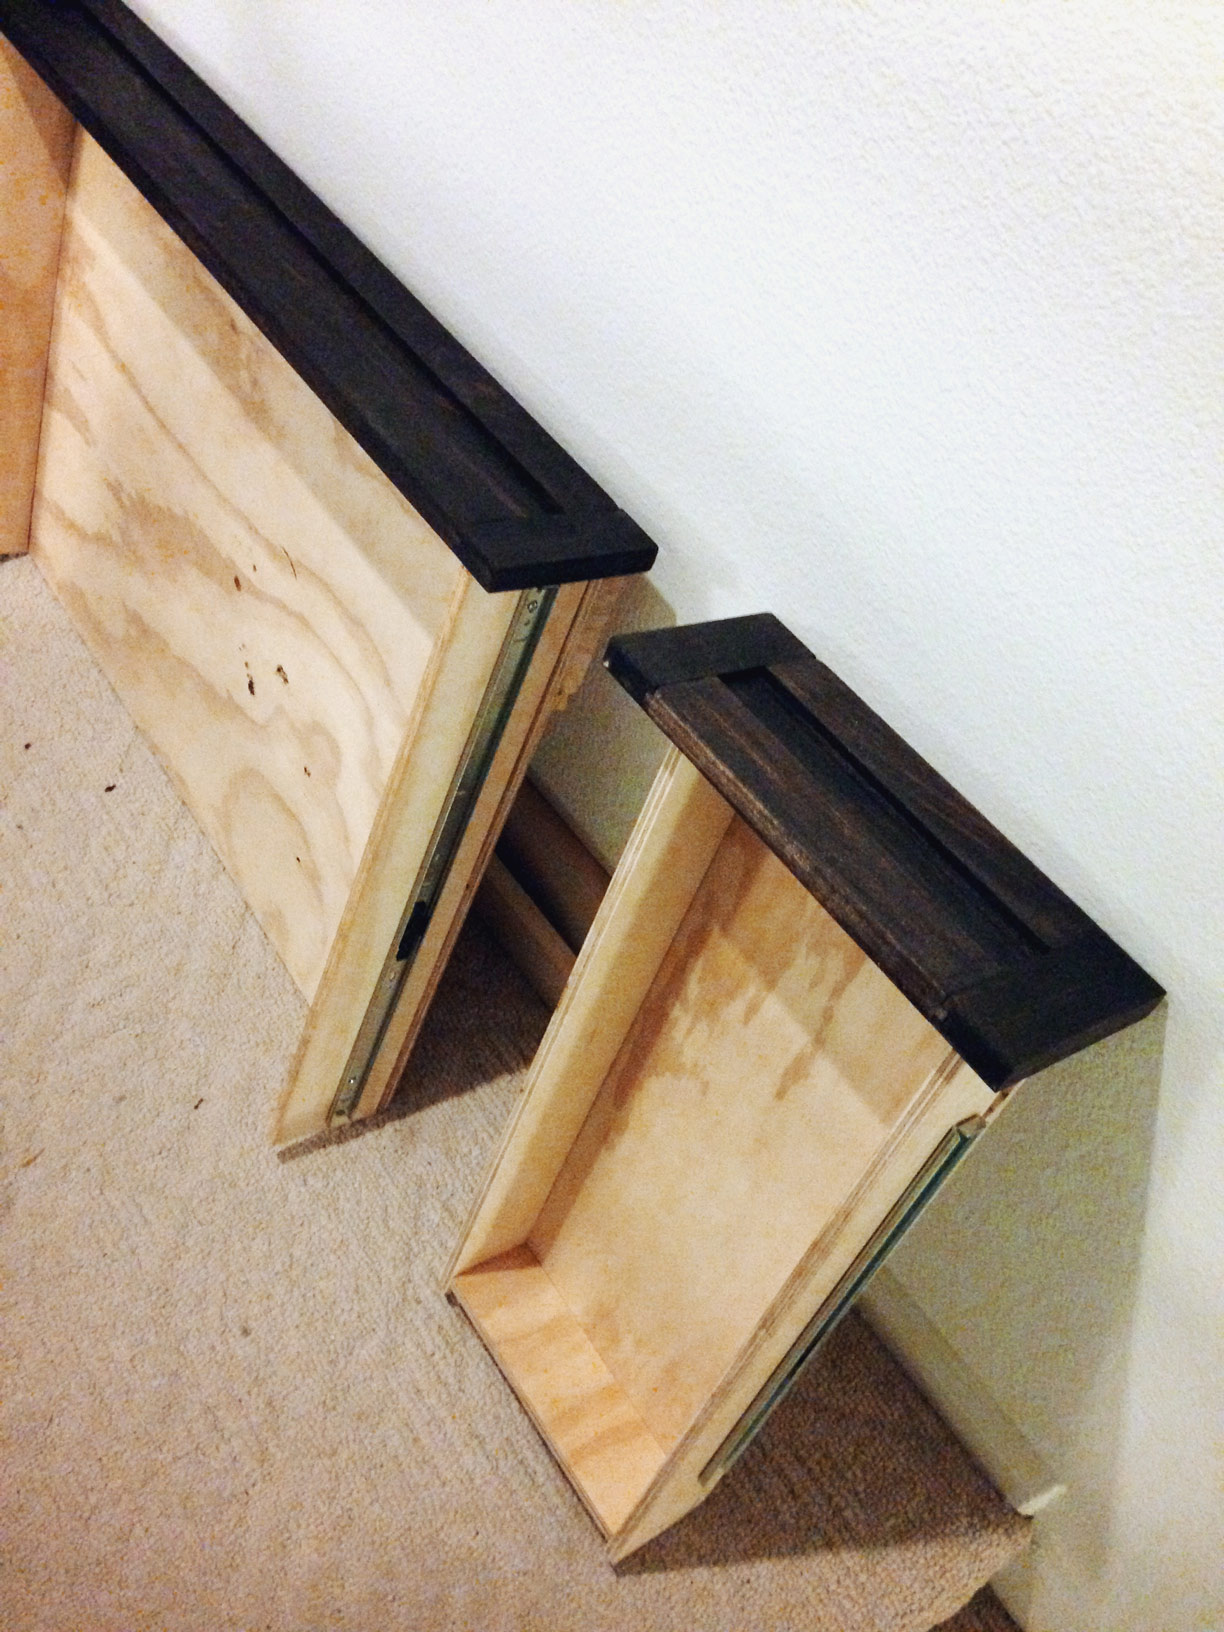
The desk design used shelves of two different sizes – two smaller ones for the sides and one main shelf in the middle to hold the keyboard
I used a dark walnut stain for the desk, and then used a couple coats of polyurethane to finish it. The poly made a huge difference, letting the desk really shine.
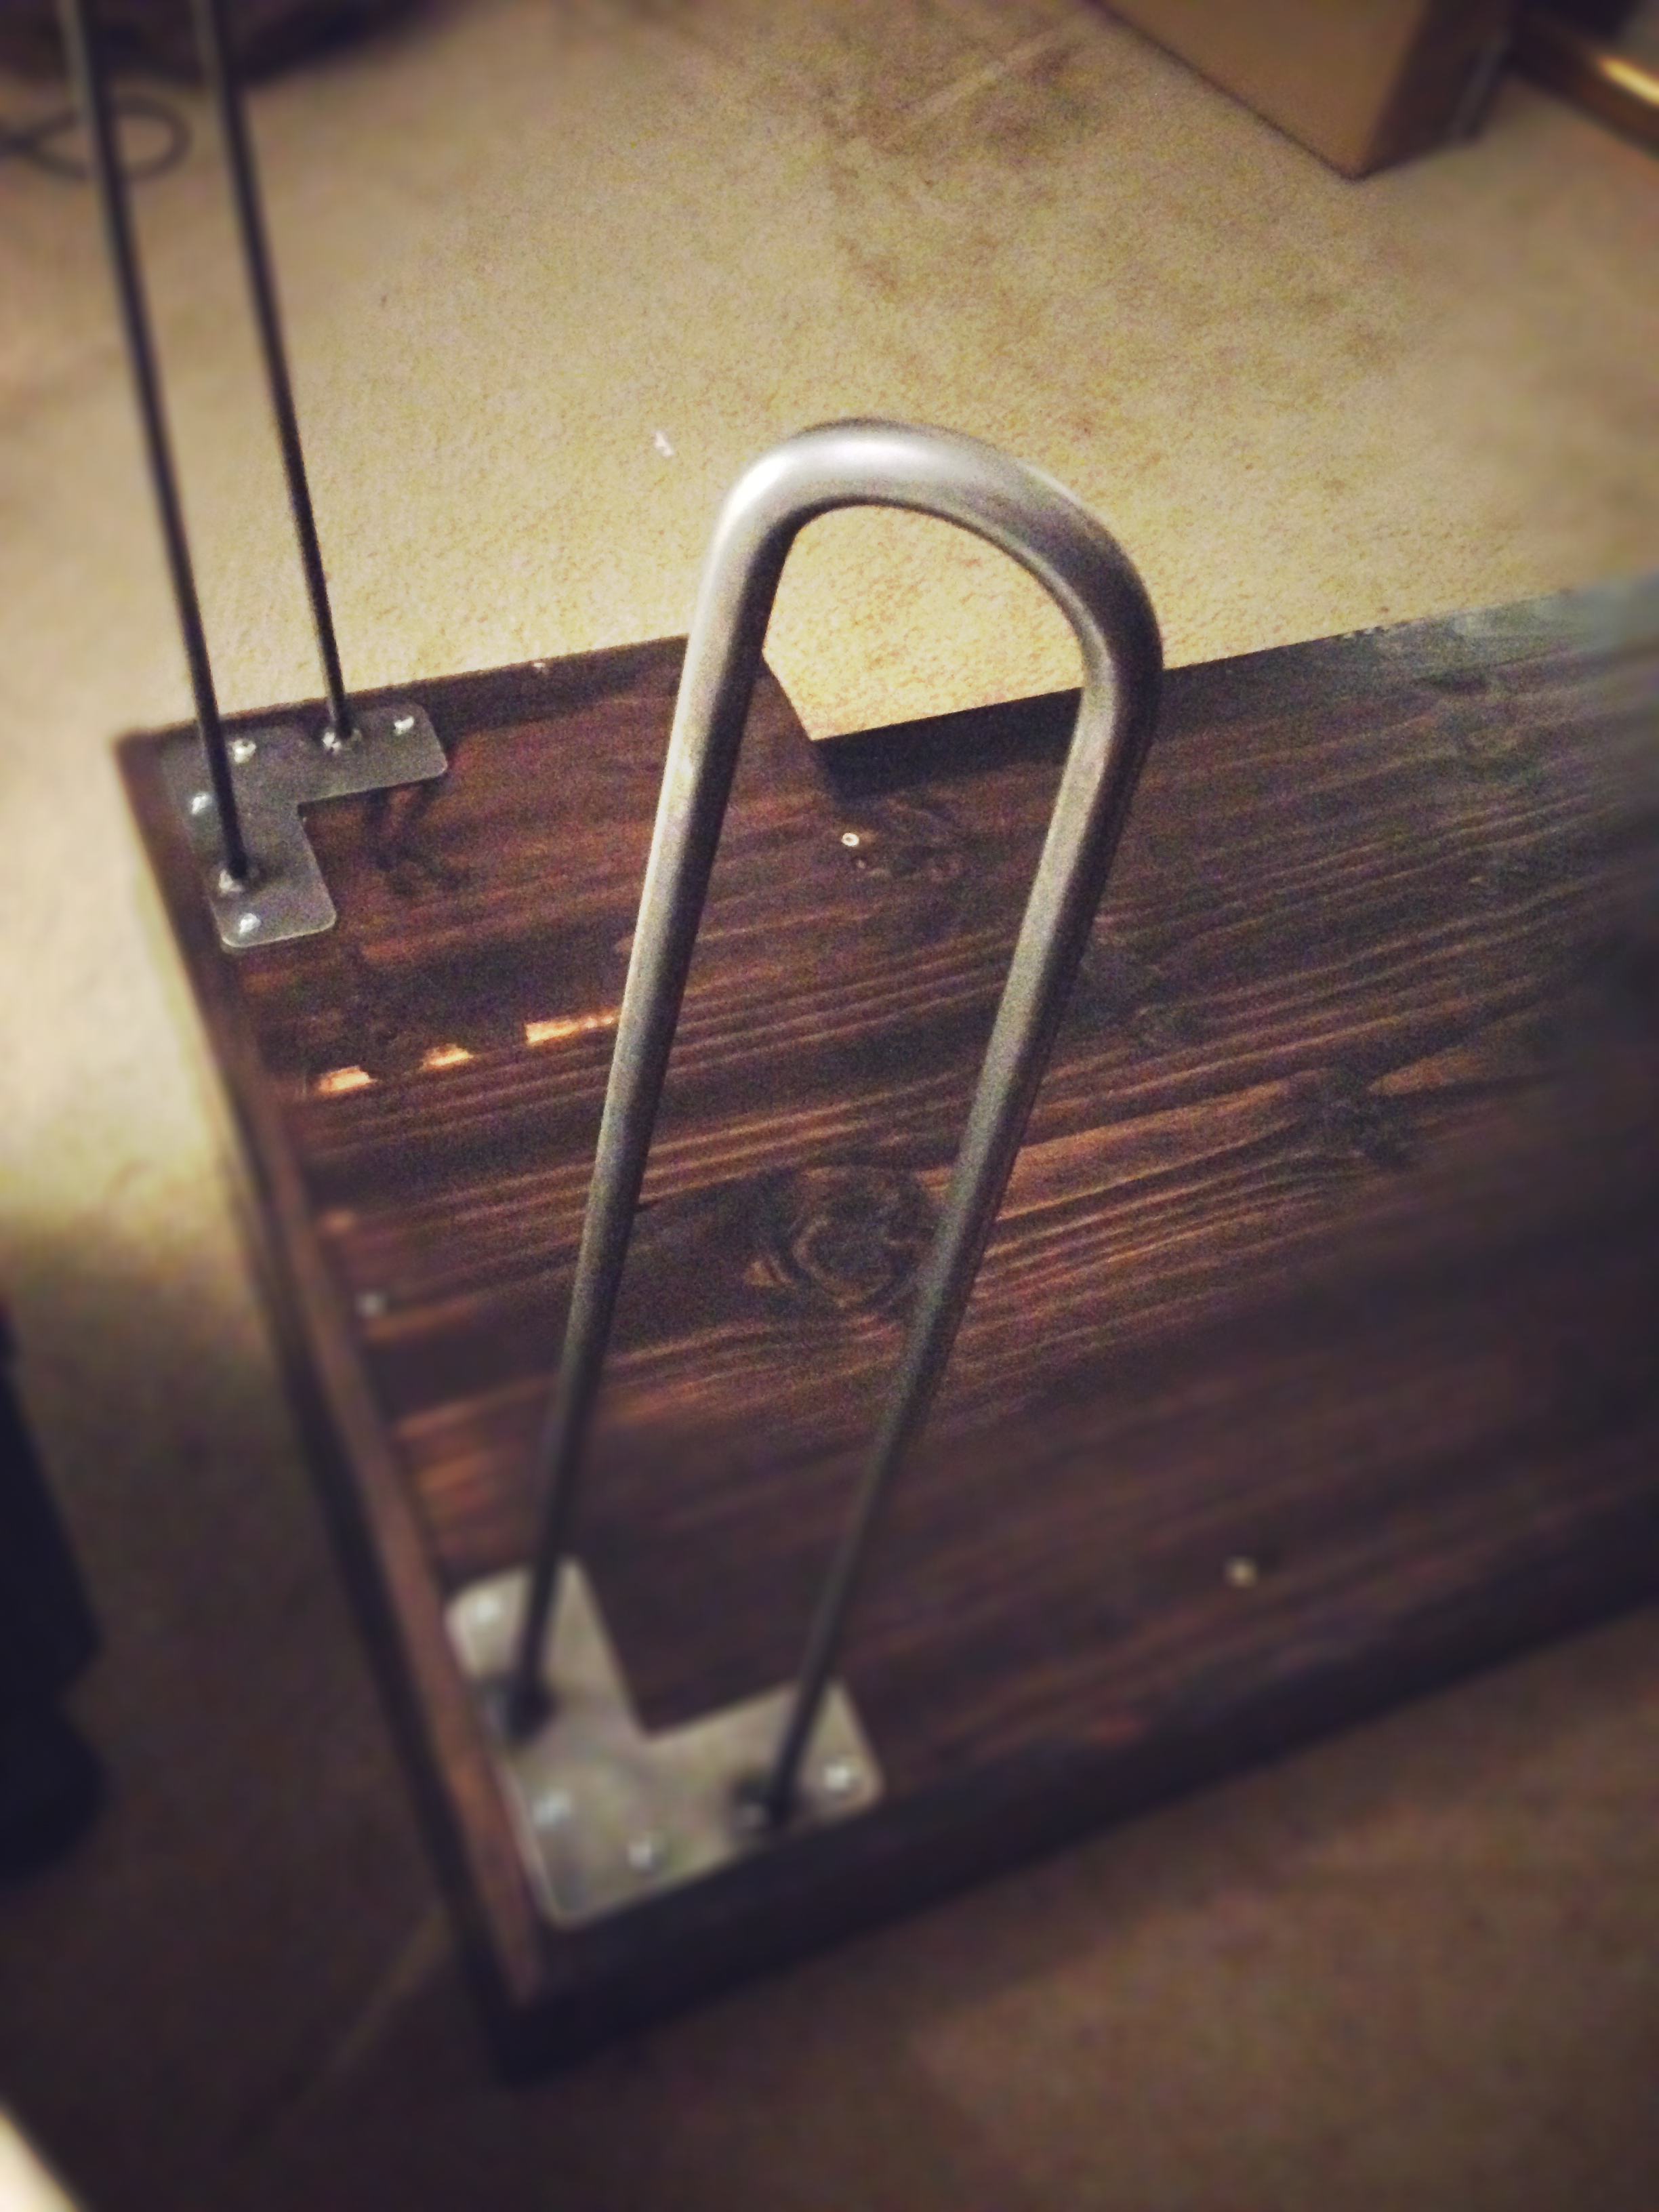
Once everything was constructed it was time for the last step – attaching the legs. I bought the legs from an online hairpin leg manufacturer and really like the character they gave the desk. However, I didn’t realize until it was time to attach them that I really needed some round-head screws to sit flush against the leg’s plates. Luckily I’d saved some from a table I salvaged (or, as my roommate might say, lifted from the side of the street) and after some quick drilling, the desk was assembled!
The pullout shelf ended up working well after a few adjustments; originally I set the sliders too high and the shelf didn’t have enough clearance to close (again, a problem I could have avoided by aligning the sliders along the bottom of the shelves). The last step was to attach the front panel of the middle shelf. I needed it to be able to fold down flat in order to play the keyboard; for that I needed some flap hinges. Installing them was a bit of a trick, as I had to bore out a hole in the bottom of my shelf and panel in order to get them flush, but they work great.
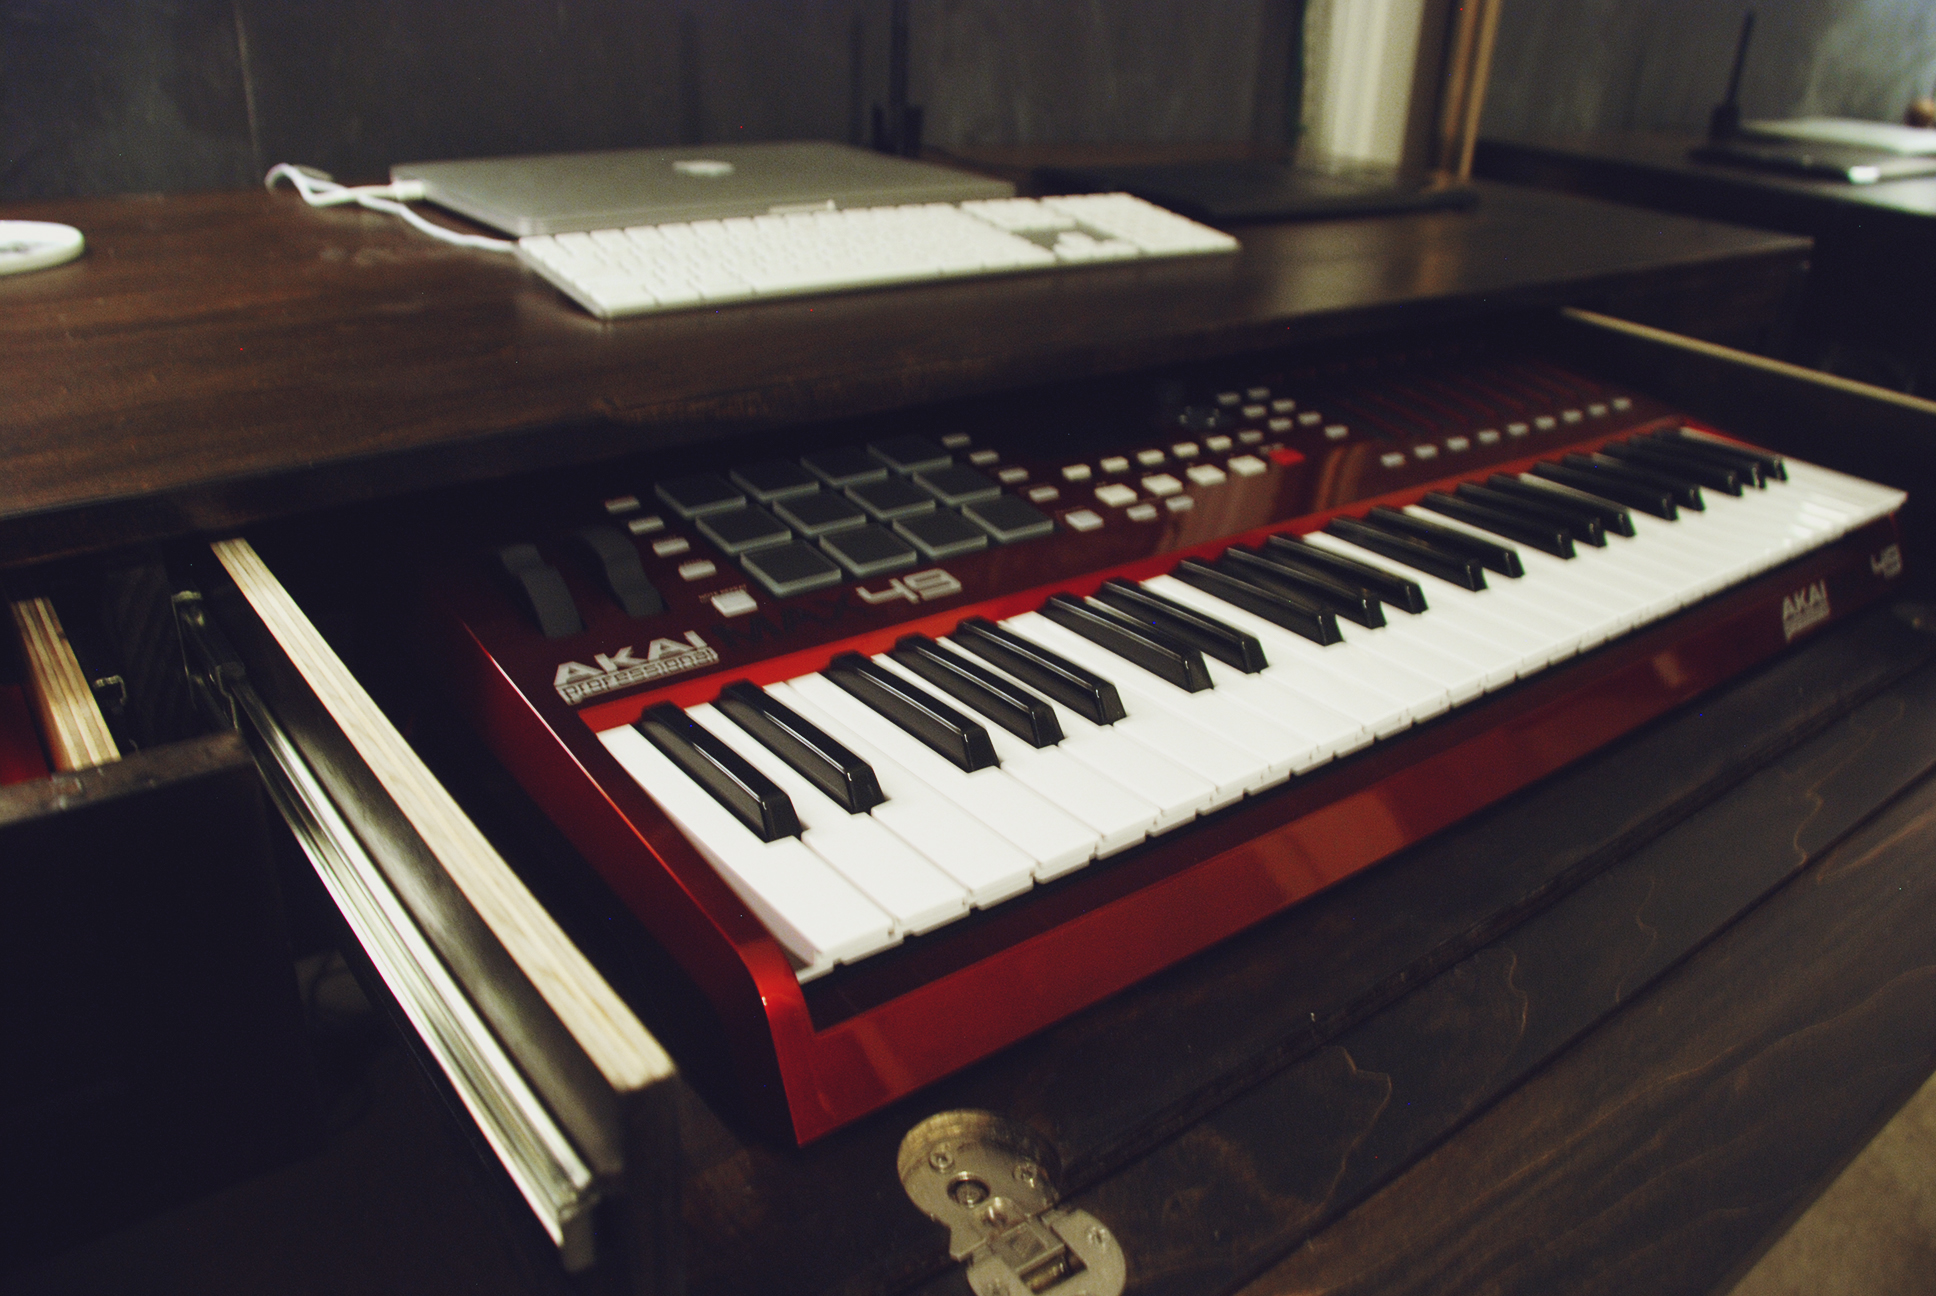
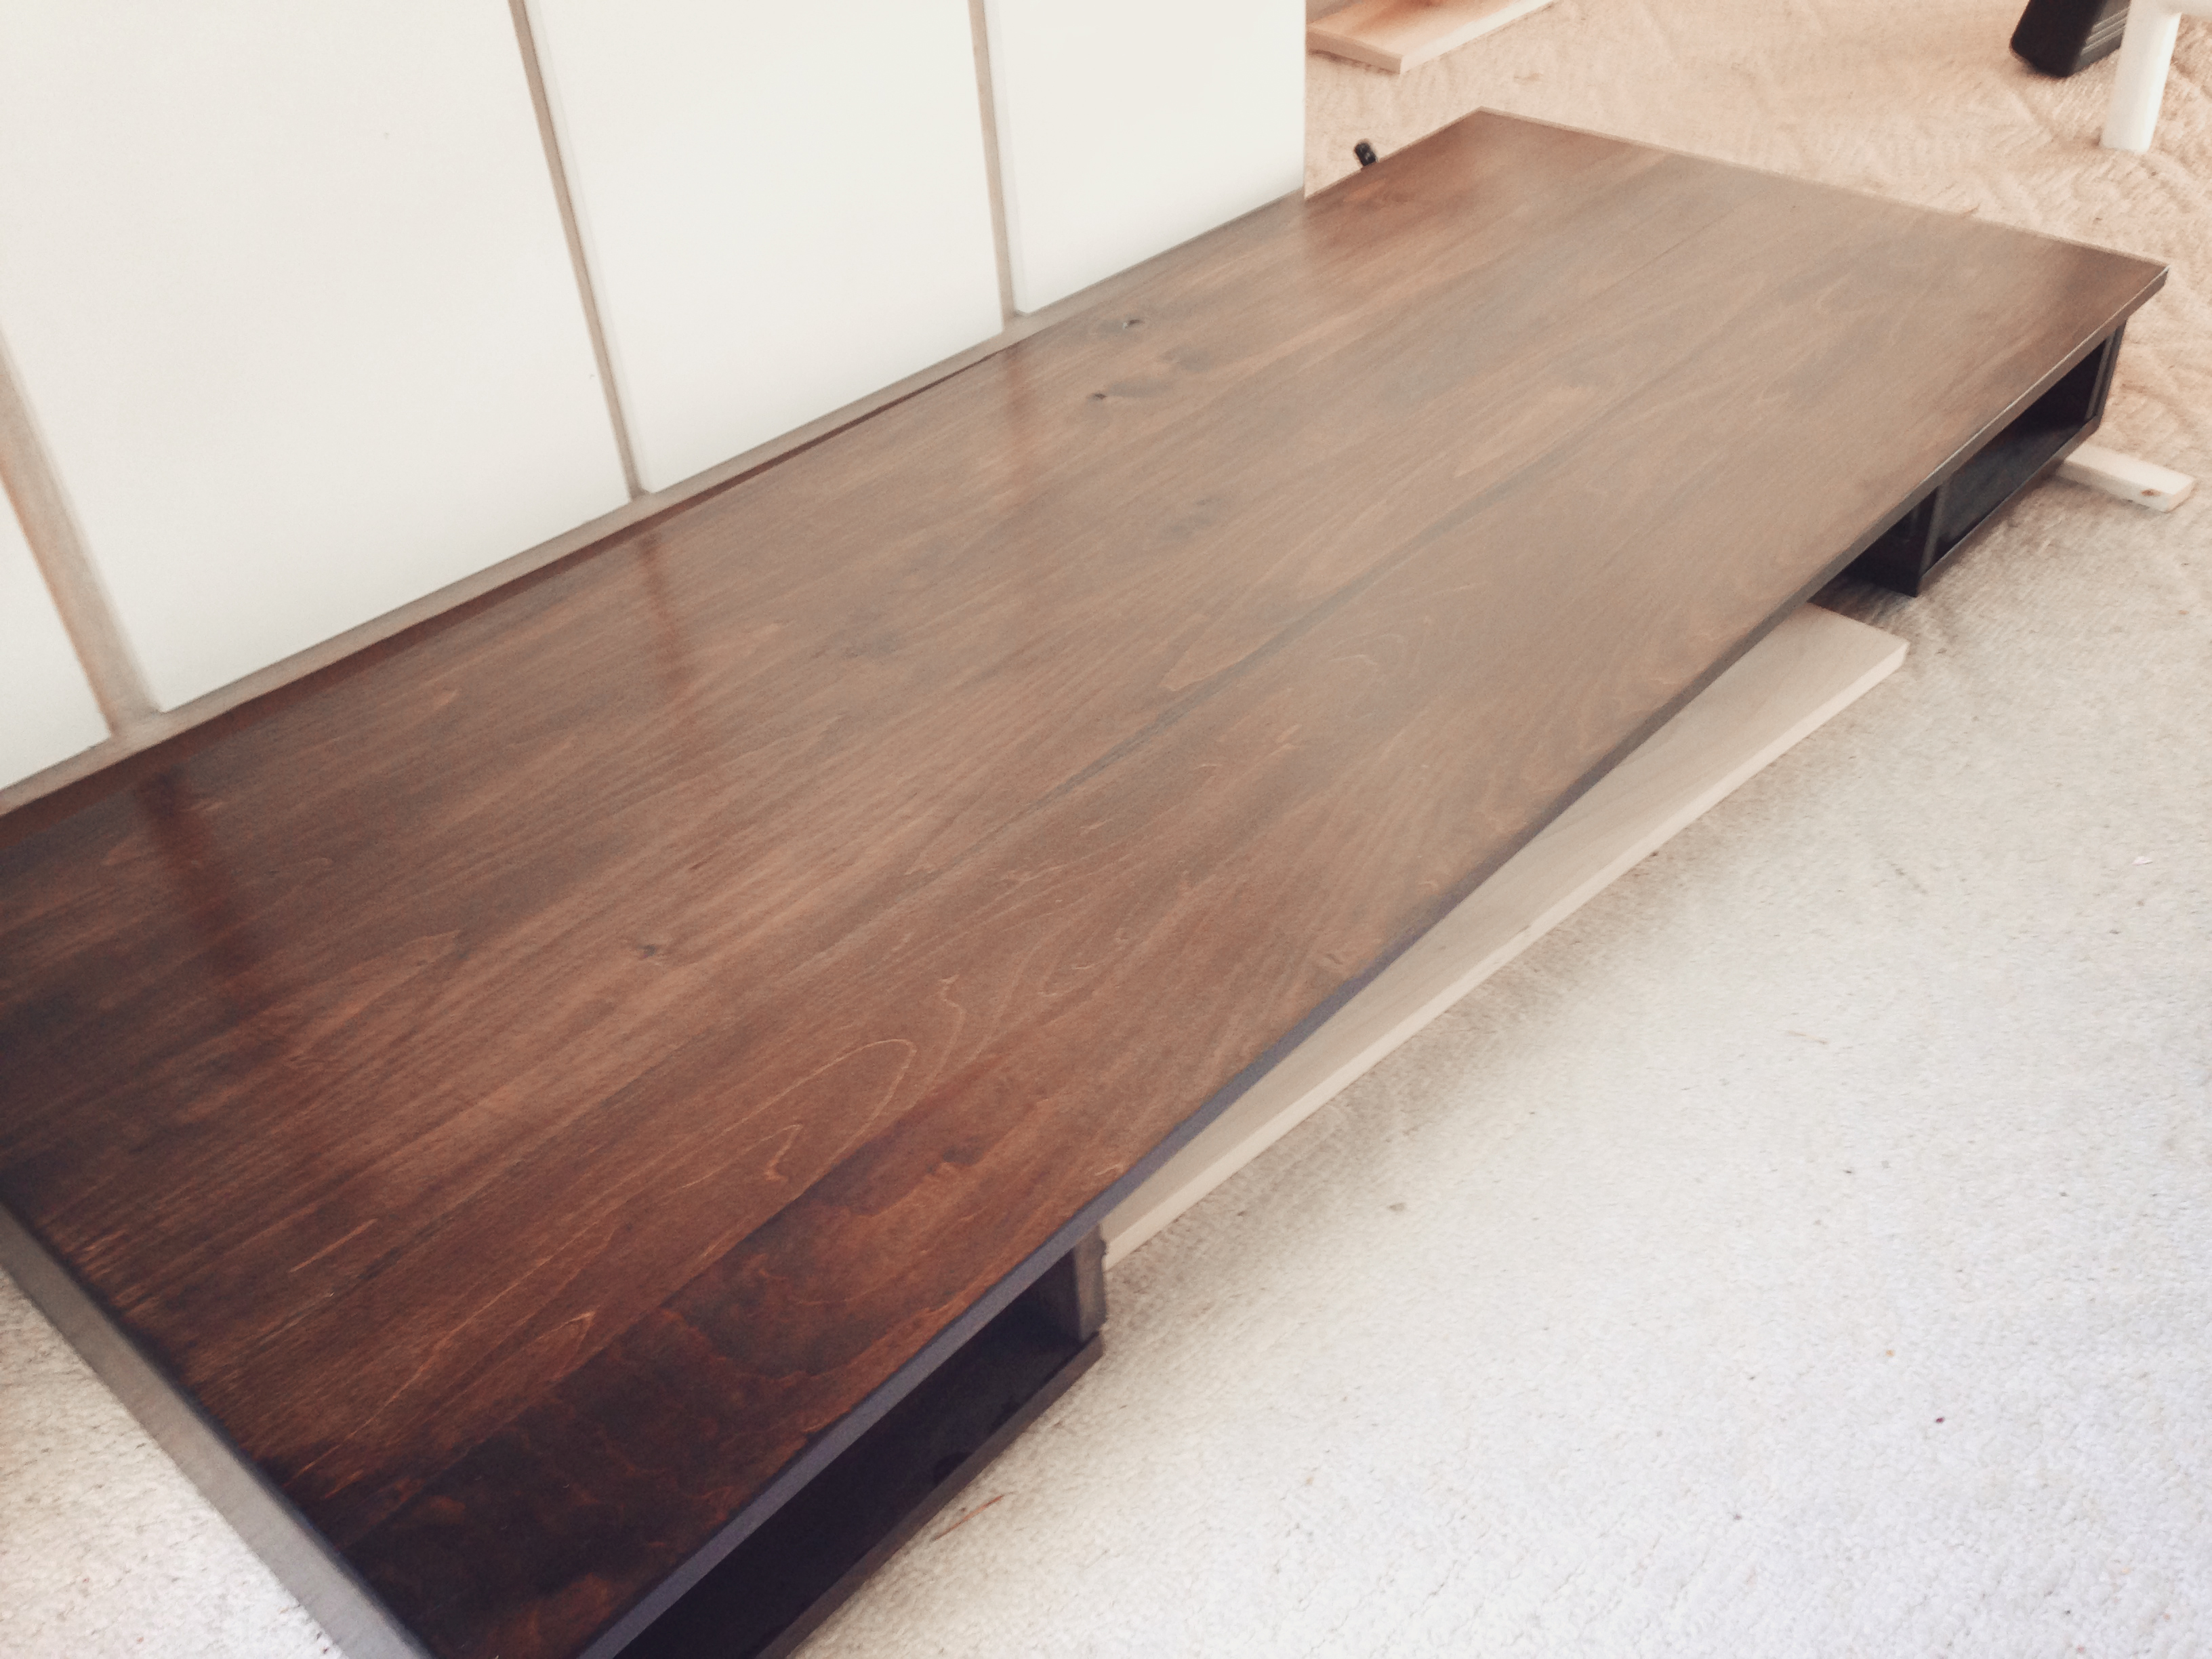
Desk with keyboard controller drawn out
I’m really happy with how the piece turned out, and now I have a desk that takes up less space, adds some style to my room and will hopefully last me for years to come. Most importantly, it holds things up pretty well – foreheads included.

And that does it!